 王张开
王张开echarts
来看下vue2.x中如何下载并应用echarts组件。
1. 下载
# 下面两个命令都行
npm install echarts --save
npm install echarts -S

# 或者配置淘宝镜像,然后用cnpm安装
npm install -g cnpm --registry=https://registry.npm.taobao.org
cnpm install echarts -S2. vue项目中配置
首先在src/main.js中全局引入:
javascript
import Vue from 'vue'
import App from './App.vue'

// 在项目的全局这么配置,这样我们就可以使用this.$echarts来使用echarts了
import echarts from 'echarts'
Vue.prototype.$echarts = echarts;

Vue.config.productionTip = false

new Vue({
  render: h => h(App),
}).$mount('#app')然后在你需要的组件中引入就行,这里以app.vue中为例。
注意,显示区域也就是div标签一定要设置宽高才能正常显示图标。
vue
highcharts
vue2.6.11
Highcharts官档:https://www.highcharts.com.cn/
Highcharts Vue的官方教程参考连接:https://www.highcharts.com.cn/docs/highcharts-vue
全局配置示例:https://codesandbox.io/embed/vue-template-c91vy?fontsize=14
局部配置示例:https://codesandbox.io/embed/vue-template-c91vy?fontsize=14
再来看下如何在vue项目中引入highcharts。
1. 下载
npm install highcharts-vue2. vue项目中配置
首先在src/main.js中全局引入:
javascript
import Vue from 'vue'
import App from './App.vue'

// 在项目的全局引入
import HighchartsVue from 'highcharts-vue'
Vue.use(HighchartsVue)


Vue.config.productionTip = false

new Vue({
  render: h => h(App),
}).$mount('#app')然后在你需要的组件中引入就行,这里以app.vue中为例:
vue
<template>
  <div id="app">
    <h1>highcharts示例</h1>
    <h4>可以配置多个</h4>
    <highcharts :options="opt1"></highcharts>
    <highcharts :options="opt2"></highcharts>
  </div>
</template>

<script>
export default {
  name: 'App',
  data(){
    return {
      opt1: {
        series: [{
          data: [1, 2, 3] // sample data
        }]
      },
      opt2: {
        series: [{
          data: [1, 2, 3] // sample data
        }]
      },
    }
  },
  components: {
  }
}
</script>

<style>
#app {
  font-family: Avenir, Helvetica, Arial, sans-serif;
  -webkit-font-smoothing: antialiased;
  -moz-osx-font-smoothing: grayscale;
  text-align: center;
  color: #2c3e50;
  margin-top: 60px;
}
</style>element-ui
下载
# 下载最新版
npm i element-ui
npm install element-ui
# 卸载
npm uninstall element-ui
# 下载指定版本
npm i element-ui@version
npm i element-ui@2.6.3引入
ElementUI提供了很多的组件供我们使用,所以,我们在npm下载完之后,
引入时,根据需求,就有两种引入方式:
- 完整引入,无容置疑,即在当前项目中引入ElementUI的所有组件。
- 按需引入,即按需引入ElementUI的部分组件。
那么,ElementUI提供了哪些组件呢?在这个https://element.eleme.cn/#/zh-CN/component/quickstart链接中,有详细的说明。
在你vue的项目的src目录下main.js中进行引入:
javascript
import Vue from 'vue'
import App from './App'
/* 完整引入就是下面这三行 */
import ElementUI from 'element-ui'
import 'element-ui/lib/theme-chalk/index.css'
Vue.use(ElementUI);

/* 按需引入就是下面这几行 */
// import {Button, Select} from "element-ui";
// import 'element-ui/lib/theme-chalk/index.css'
// Vue.use(Button);
// Vue.use(Select);

Vue.config.productionTip = false

/* eslint-disable no-new */
new Vue({
  el: '#app',
  components: { App },
  template: '<App/>'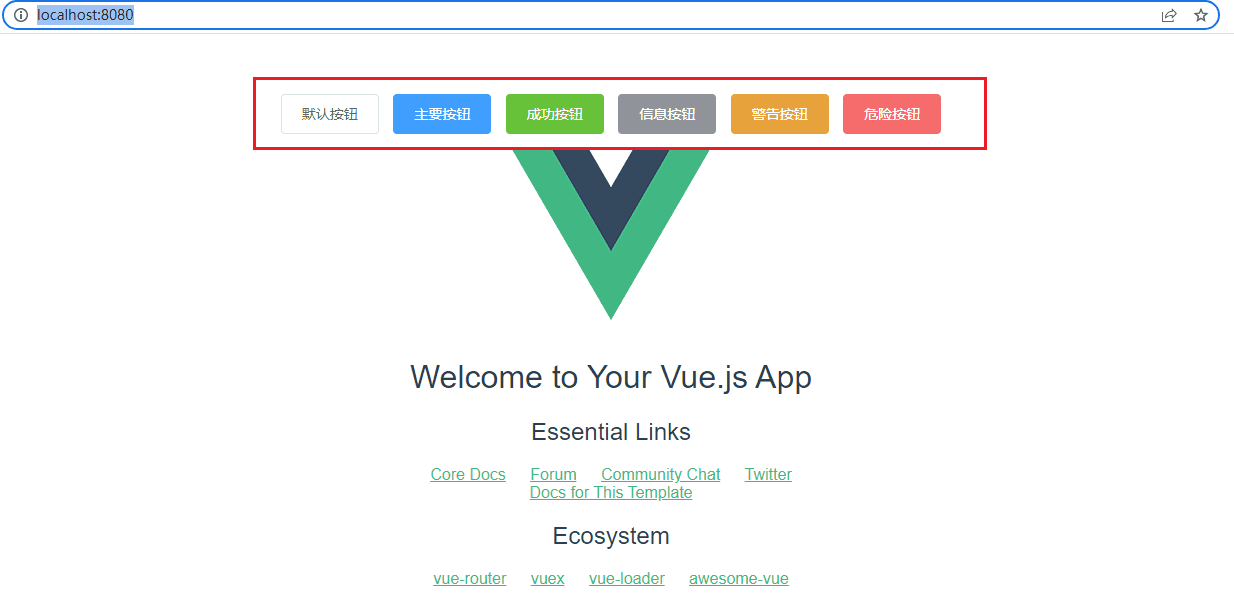
})然后再你的组件中,就可以用了,比如我在src/App.vue中随便引入组图标:
vue
<template>
  <div id="app">
    <el-row>
      <el-button>默认按钮</el-button>
      <el-button type="primary">主要按钮</el-button>
      <el-button type="success">成功按钮</el-button>
      <el-button type="info">信息按钮</el-button>
      <el-button type="warning">警告按钮</el-button>
      <el-button type="danger">危险按钮</el-button>
    </el-row>
    <img src="./assets/logo.png">
    <HelloWorld/>
  </div>
</template>

<script>
import HelloWorld from './components/HelloWorld'

export default {
  name: 'App',
  components: {
    HelloWorld
  }
}
</script>

<style>
#app {
  font-family: 'Avenir', Helvetica, Arial, sans-serif;
  -webkit-font-smoothing: antialiased;
  -moz-osx-font-smoothing: grayscale;
  text-align: center;
  color: #2c3e50;
  margin-top: 60px;
}
</style>运行你的项目,就立马能看到效果了。
 png)
png)